

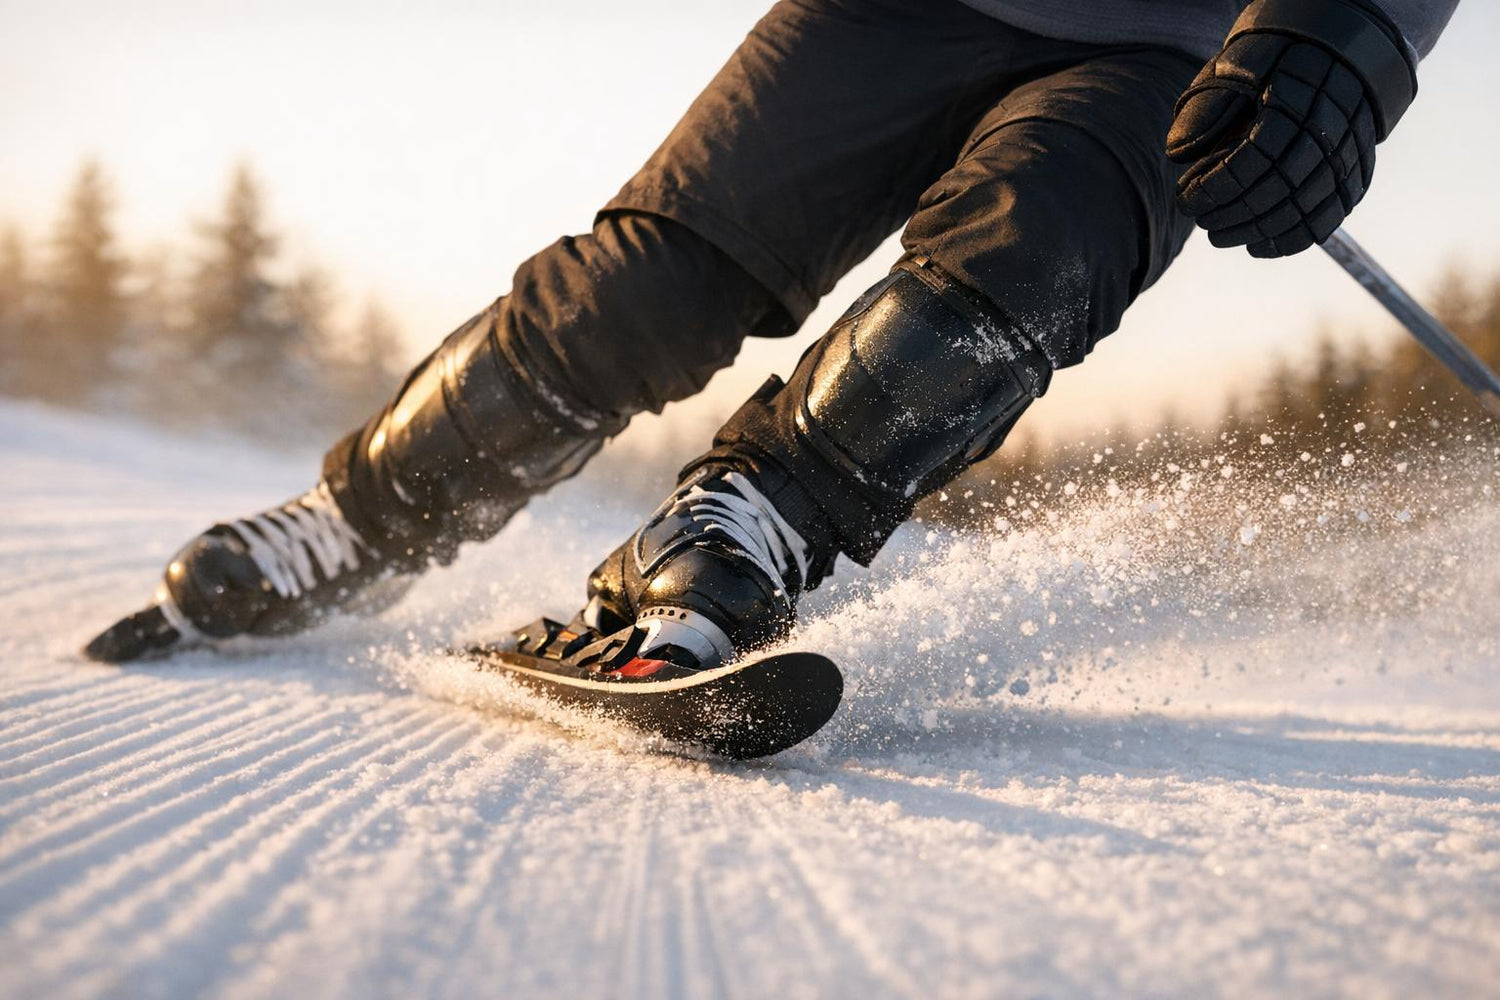
Want to take your hockey skills beyond the rink? Skiskating is the perfect way to transition from ice to snow. It uses the same mechanics - like edge control, single-leg balance, and a low stance - but swaps out skates for short skis. Here’s a quick breakdown of what you need to know:
- Why it works for hockey players: Your training already gives you the balance, agility, and power needed for skiskating.
- Key techniques: Push-offs, edge pressure, and weight transfer are similar to hockey strides.
- Gear essentials: Compact skiskates (starting at $190), snowboard or ski boot bindings, and proper setup.
- Drills to get started: Practice one-foot glides, figure eights, and uphill herringbone steps.
- Advanced tips: Learn hockey stops, downhill control, and even jumps for steeper terrain.
This sport builds on your existing skills while offering a low-impact, full-body workout. With the right equipment and a few practice drills, you’ll be gliding through snowy trails in no time.
Ice Hockey vs Skiskating: Skill Transfer Guide for Hockey Players
Snowfeet* & Skiskates Tutorial - How to Become a PRO Skiskater
sbb-itb-32287b2
Why Hockey Players Excel at Skiskating
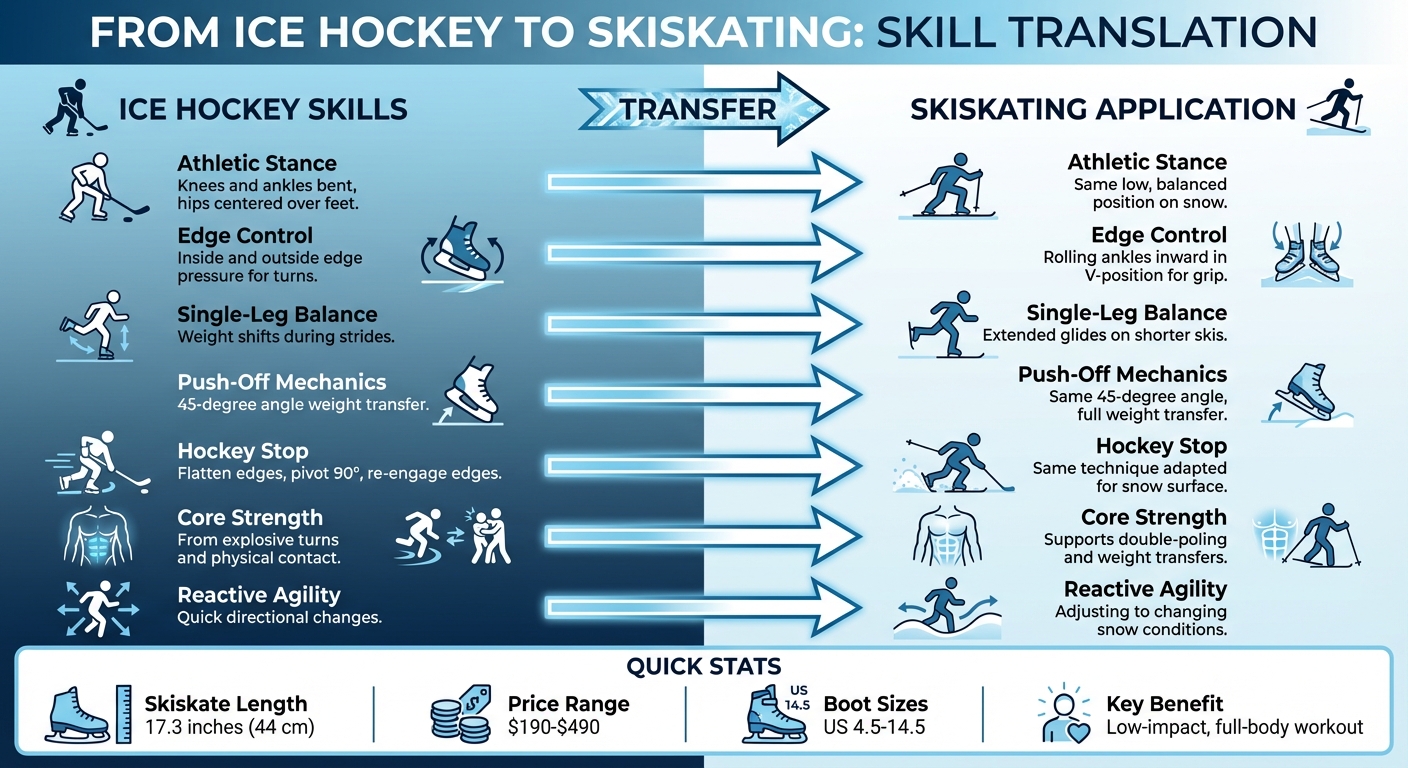
If you’ve spent time on the ice playing hockey, you might be surprised to learn how much of your training translates directly to skiskating. The athletic stance you’ve perfected - knees and ankles bent, hips centered over your feet - is almost identical to the posture needed on snow. This low, balanced position not only improves your stability but also sharpens your reaction time, whether you’re weaving through defenders on the ice or gliding down a snowy trail.
Agility and Edge Control
Hockey players bring an edge - literally. Your ability to control inside and outside edges on the ice gives you a huge advantage on skiskates. On snow, engaging those edges is key to powering your movement. For example, when you push off in the "V" position - similar to the herringbone stance used for climbing - you’re rolling your ankles inward to grip the snow, just like you would on the ice. As Coach Jeremy from How To Hockey puts it:
In hockey we want speed, power and agility.
Those quick, controlled turns you’ve mastered, bending deeply at the knees and shifting your weight, work just as well on skiskates. Edge pressure becomes your steering mechanism, helping you maintain control and direction. The weight transfer from push-off to glide? That’s a move you already know by heart. Your ability to stay balanced over a single blade on the ice translates perfectly to the shorter skis used in skiskating, where trusting your edges is vital for navigating uneven terrain.
Balance and Stability
Hockey’s emphasis on single-leg stability gives you a head start in skiskating. The rhythmic weight shifts you’ve practiced during countless strides on the ice prepare you for the balance needed on skis. Hockey skates, with their short and curved blades designed for quick maneuvers, are great training for the shorter skis of skiskating, which demand similar control and stability. As TrainingPeaks coach Carrie McCusker explains:
A stiff, upright skier falls easily while a relaxed, poised skier navigates terrain changes with ease.
Your hockey stance - relaxed yet ready - helps you stay poised and adaptable on snow.
Beyond balance, the core strength you’ve built from explosive turns and handling physical contact in hockey is a huge asset. That strength supports the double-poling motion and weight transfers required in skiskating. Plus, your reactive agility, developed through drills and plyometric training, helps you adjust to changing snow conditions. Keep your knees bent to maximize power during push-offs and maintain control. The good news? Your body already knows how to handle the mechanics - you’re just applying them to a new surface.
Skiskating Equipment for Hockey Players
Getting the right gear is essential for skiskating. These compact skates offer excellent portability and work seamlessly with various boots.
Choosing the Right Skiskates
Skiskates are compact, measuring only 17.3 inches (44 cm) in length - small enough to fit in a backpack, making them far more convenient than traditional skis. The 44 cm wood core model is priced at $490 and features metal edges, allowing you to perform hockey stops with precision. As the Snowfeet Store explains:
"You stop just like on skis or skates - with a hockey stop or heel brake." – Snowfeet Store
When it comes to bindings, you have two main options:
- Snowboard boot bindings: These provide flexibility and comfort, accommodating US sizes 6–14.5.
- Ski boot bindings: Designed for better control and stability, they fit US sizes 4.5–14.5.
For skiskates shorter than 100 cm, non-release bindings are often the best choice. They’re lightweight, require no tools, and are easy to adjust.
If you're on a budget, consider these alternatives:
- A 50 cm fiberglass model for $207 (discounted from $250).
- A 38 cm mini version for $190.
Both options come with adjustable bindings that fit most adult sizes (US 6–13). Once you've picked a model and bindings, you can fine-tune your gear for maximum performance.
Setup and Adjustment Tips
To set up your skiskates, place your boot into the binding and adjust it until secure, leaving about two fingers of space behind your heel. The tool-free adjustment makes tweaks on the slopes quick and easy.
Fiberglass models need regular waxing to maintain a smooth glide. Wood core models usually come pre-waxed, but adding an extra coat can improve performance. Keep your weight centered or slightly on your heels, with knees bent, to maintain an athletic stance. If you feel unsteady, try positioning one foot slightly ahead of the other to create a wider base. To stay in control during turns, lean into your edges as you would on ice - this helps prevent your legs from sliding apart on slopes.
Basic Skiskating Techniques
Glides, Push-Offs, and Stops
If you've got hockey training under your belt, you're already a step ahead when it comes to skiskating. The basic movements are similar, though you'll need to tweak them slightly for the snow. Start with an athletic stance you’re familiar with: knees bent deeply, feet about shoulder-width apart, and your weight centered low. As Coach Jeremy from How To Hockey explains:
"In hockey we want speed, power and agility... Your power and speed comes from your legs, and you can't get much power if you don't bend your knees first."
Begin with your skiskates in a V-position - heels together and tips pointing outward. Push off at a 45-degree angle, ensuring you transfer your full weight to the gliding leg. On snow, this complete weight transfer is crucial for maintaining momentum, unlike the partial shifts you might use on ice. Keep your nose, knee, and ski tip aligned over the gliding leg to stay balanced.
When it comes to stopping, the hockey stop works on snow, but with a slight adjustment. Flatten your skiskates to release the edges, pivot them 90 degrees to the direction of travel, and then re-engage the edges to dig into the snow. As noted by the editors at Skiing Magazine:
"The hockey stop is as much a balance drill as it is a turning exercise. To stop quickly, you must be well balanced over the middle of your skis."
If you need a more gradual method, try the wedge technique, often called the snowplow. Push your heels outward to form a V-shape with the ski tips close together, and roll your knees inward to engage the inside edges. This technique is slower but effective, especially for beginners. Start practicing without poles so you can focus entirely on leg strength and balance.
Once these basics feel natural, move on to drills that build confidence and skill on flat terrain.
Building Confidence on Flat Terrain
After nailing the basic movements, it’s time to get comfortable gliding on flat terrain. This is where you’ll refine your edge control, balance, and rhythm through focused drills.
Start with the waddle skate drill. Shift your weight from one ski to the other while lifting the non-gliding foot. This helps develop the muscle memory needed for smooth, extended glides. Then, try the split skate drill. With your toes pointed outward, push your hips forward and let the skiskates naturally slide apart. This drill teaches you how your hip position influences forward motion.
To avoid leaning back - something that snow’s resistance might tempt you to do - press your shins against the front of your boots. Unlike ice, snow requires a smoother, more rhythmic motion rather than explosive bursts of energy. Fischer Sports emphasizes this balance:
"A good glide is where you get speed and smoothness from. Don't try to generate all your speed with a frenetic kick phase. Kicking and gliding are both important."
For edge control, practice alternating between flat skis (for speed) and angled edges (to slow down). A great exercise is the garland drill. On a gentle slope, traverse across the hill, releasing your edge slightly to let the skis drift downhill, then re-engaging the edge to steer back across. This drill helps you fine-tune how edges control both your speed and direction on snow.
These drills will not only build your confidence but also lay the groundwork for tackling more advanced terrain.
Drills to Improve Your Skiskating
Flat Ground Drills
Fine-tune your skiskating technique with drills designed to target balance and edge control. Begin with one-foot glides: stand stationary on one ski, then progress to longer glides across flat terrain. This exercise strengthens core stability and improves your ability to transfer weight effectively. To push your balance further, try the self-righting hop drill, where you perform small hops on one ski. It’s a great way to build stability and confidence.
For edge control, practice the T-drill. Start by pushing off with your inside edge at a 45° angle. Follow this with figure eights using cones, which help you practice tight turns and transition seamlessly between your inside and outside edges - movements that mimic quick directional changes on ice. To take it up a notch, try the javelin turn drill: lift your inside ski and angle it diagonally over your outside ski during turns. This isolates your balance on the outside edge, helping you refine your carving technique.
Here’s an example of how effective these drills can be: in January 2026, skier Aidan Williams, coached by Tom Waddington, used the Carv digital coaching system to improve his form. Williams started with a Ski:IQ of 126, hindered by a narrow stance and poor hip alignment. By practicing the javelin turn drill, he corrected his posture, and after just one focused practice session, his Ski:IQ jumped to 140. This improvement reflected better carving efficiency and edge control.
Once you’re comfortable on flat terrain, take these drills to varied terrains to enhance your agility and adaptability.
Uphill and Downhill Training
After mastering flat ground techniques, challenge yourself with uphill and downhill drills to build strength and control. For uphill power, adapt the hockey suicide sprint to the slopes. Set markers on an incline and skate at full intensity to each marker and back. This drill develops explosive power and leg endurance. On moderate inclines, use the V1 rhythm, a 3-1 push-off pattern where your poles and one ski push together, followed by a solo push with the opposite ski. For steeper slopes, rely on the herringbone technique: form a wide V with your skis, engage the inside edges, and take deliberate, controlled steps upward.
For downhill agility, focus on drills that sharpen your control. Practice stomp turns and lane changes to improve your balance and ability to adjust turn rhythms. Then, try the hourglass turns drill: set cones in an hourglass pattern on a slope and match your turns to the cone layout as you descend. This exercise teaches you to manage speed by varying your turn shapes and radii.
These drills, when practiced consistently, can transform your skiskating skills, making you more powerful and precise on any terrain.
Advanced Techniques for Steeper Terrain
Once you've nailed the basics, it's time to push your skiskating skills further by taking on the challenges of steeper terrain.
Jumps and Tricks
When you're comfortable on moderate slopes, steeper terrain opens the door to incorporating jumps and tricks that mirror the creativity of ice skating. To execute these maneuvers safely, focus on maintaining a low, athletic stance. Bend your knees and ankles deeply, and keep your hips aligned over your feet. This helps you absorb impacts and adjust quickly to changes.
Before attempting any jump or trick, practice the "bounce" mechanic - a flexible hop similar to the movement used in a hockey stop. This action preps your body for quick transitions and gives you better control when launching off features. Start small: practice jumping over minor obstacles on flat ground. Once confident, move to steeper slopes. Before you begin, take a moment at the top to assess the terrain for obstacles, icy patches, or areas where falling could be risky. Face downhill in a compact, balanced posture to enhance stability.
For controlling speed on steep slopes, opt for skid turns instead of carving. A low edge angle allows your skis to pivot underneath you, providing the control needed to set up for tricks. Use strong downhill pole plants for added stability during sharp turns or jumps. And if you do take a tumble, roll into a "dead bug" position - with your feet and arms up - to untangle your gear before getting back on your feet.
Mastering these controlled maneuvers lays the groundwork for drills that improve your agility on challenging terrain.
Reactive Agility Drills
Building on jumps and a low, stable stance, agility drills are essential for improving responsiveness on steep slopes. Steep terrain requires split-second decisions, and targeted drills can help you develop that quick reaction time. Hop turns are a great starting point. These involve explosive, simultaneous pivots of both legs to quickly change direction. Begin practicing on moderate slopes and gradually progress to steeper pitches, where precise edge control becomes key.
Another effective drill is lane changes. This involves making three short turns followed by a long traverse, constantly shifting your turning position on the hill. It sharpens your ability to adapt your rhythm and react to changing terrain. For an added challenge, try leapers - vertical hops that initiate turns. These help you navigate tricky snow conditions more effectively. Keep your upper body stable and facing downhill while your feet transition swiftly from the big toe edge to the little toe edge. To avoid over-rotating during quick turns, point your uphill hand down the fall line toward your next transition. This keeps your body aligned and ensures consistent pressure on your outside ski.
These drills and techniques will not only enhance your control but also boost your confidence on steeper, more demanding slopes.
Conclusion
With your honed skills and prepared equipment, skiskating offers a seamless transition from ice to snow. Your ability to control edges, maintain an athletic stance with bent knees, and execute precise 45-degree push-offs already sets you up for success on skiskates.
Thanks to your hockey-conditioned strength, skiskating provides an energetic, full-body workout that boosts cardiovascular endurance, strengthens your legs, and stabilizes your core. This low-impact activity keeps your explosive power and agility sharp while sparing your joints from the strain of high-impact sports. Plus, familiar techniques like the hockey stop translate effortlessly, giving you control over speed and direction on snow.
The learning curve is minimal since you're building on your existing skills. Focus on practicing weight transfer and alignment without poles to achieve smooth, full glides. And don’t forget - using proper recovery techniques, as previously discussed, ensures you stay safe and efficient as you move.
Whether you’re looking for off-season training, a new challenge, or a fresh way to enjoy winter’s beauty, skiskating transforms your hockey expertise into a thrilling snow-based experience. It’s your chance to showcase your balance, agility, and edge control in an entirely new setting. Take on this exciting opportunity and discover a whole new way to embrace the winter season.
FAQs
Which hockey skills are most useful for skiskating?
Hockey players possess a solid set of skills that naturally support their transition to skiskating. Core abilities like balance, edge control, and weight transfer - honed on the ice - translate effortlessly to navigating short skis on snow, giving them a head start.
The quick reflexes and agility developed through hockey’s fast-paced gameplay also play a big role in mastering the dynamic movements skiskating demands. These pre-existing skills make it easier for hockey players to adapt, helping them gain confidence and enjoy the thrill of this winter sport more quickly.
How can I choose the best skiskates and bindings for my needs?
To pick the right skiskates and bindings, think about your skill level, how you plan to use them, and the terrain you'll tackle. Skiskates come in different lengths. Shorter ones, typically 15–17 inches, are easier to control, making them a great choice for beginners or those using them casually. On the other hand, longer skiskates, around 20 inches, offer more stability, which is ideal for advanced techniques or challenging conditions.
When it comes to bindings, ensure they match the type of boots you'll be wearing, whether that's winter sports boots or snowboard boots. A proper fit and compatibility are key for both safety and comfort.
Take into account your height, weight, and what you want to achieve on the snow. These factors will help you find skiskates and bindings that make your time on the slopes both fun and comfortable.
What are the best drills to improve my skiskating skills as a hockey player?
To sharpen your skiskating skills, prioritize drills that develop edge control, balance, and agility - essential abilities for hockey players. Begin with carving exercises, like gliding in smooth arcs without lifting your feet. This helps improve control and creates a sense of fluidity in your movements. Incorporate forward strides, lateral shifts, and quick stops to fine-tune your technique and translate your hockey skating abilities to skiskating.
To boost agility and balance, include exercises like jumping over small obstacles such as sticks or cones. These dynamic drills mimic real movement patterns, helping you feel more at ease on short skis and easing the transition from the rink to the slopes.


Leave a comment
This site is protected by hCaptcha and the hCaptcha Privacy Policy and Terms of Service apply.